How to Trace Over an Image in Graphite Precision CAD Software
Graphite users often ask how they can trace over an image in our precision CAD software. While this is a convenient technique for general shape extraction, it does not necessarily provide a precision drawing. Both parallax caused by the camera lens and perspective of the photograph greatly effect the accuracy of the drawing. A photograph taken straight on, where most things are at about the same depth, makes a fairly good candidate for tracing. It’s an effective way to recreate items where precision is not an absolute factor. Use it to create theater props or to capture a style, but not for orthopedic prostheses or mechanical parts requiring an exact match.
In our example here, let’s say you wanted to create a wireframe drawing of the red guitar body so you could plot the pattern and use it as a template to cut it out of wood.
The trick to this is to put the image in a Detail View Window, and then use Graphite’s ability to put different views on top of each other by bringing the Sheet View to the front. With the graphic being displayed in an underlying Detail View, the new geometry created goes into the Sheet View, assuring that it stays “on top” of the graphic image.
To do this:
- Open a new drawing.
- Import the bitmap or pict format graphic to trace over into the new drawing.
- Zoom All (PC=Ctrl+F, Mac=?+F) and then Zoom (PC=Ctrl+[, Mac=?+[ ) once. This centers the bitmap and gives you some room around the edge needed in the next few steps.
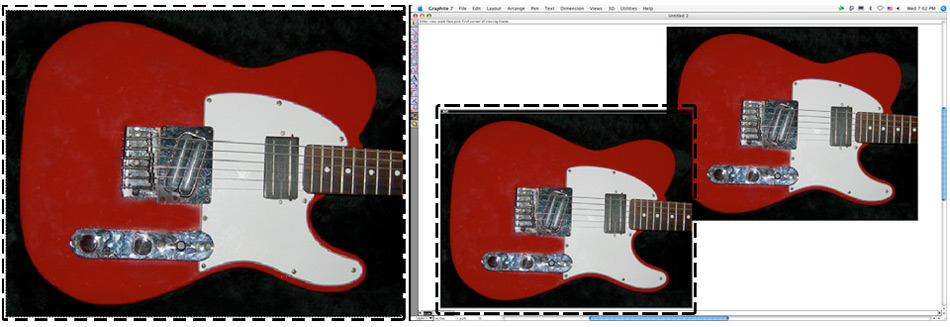
- Pick the Detail View tool. The message line reads, “Enter view scale and pick first corner of Viewing Frame.”

- Be sure to leave the scale set to 1 in the Status Line.
- Drag a Viewing Frame completely around the image. The Message Line then updates to “Drag Viewing Frame.”
- Put the cursor anywhere inside the new Viewing Frame. Press and hold the mouse button. An outline of the Viewing Frame jumps to your cursor so that the center of the new Viewing Frame is attached to the cursor.
- Drag the Viewing Frame off to the side of the drawing area and release the mouse. If it’s in a bad location you’ll move it in a future step.
- Pick the Selection Arrow tool from the Tool Palette to end the Detail View operation.
- To move the Detail View click inside it with the Arrow Tool to activate it, and drag it by its title-bar to a new location.
- Zoom All. You now see two copies of the bitmap image, one in the Detail View window, and one on the Sheet View. These are two identical images of the original object, which Graphite considers to be Model 1.
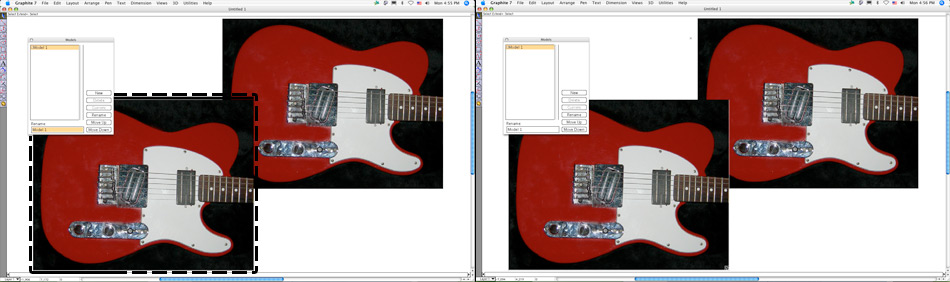
- Use Views>Models to bring up the Models dialog box.
- Click anywhere outside the Detail View window to de-activate it (thereby activating the Sheet View). The Title Bar of the Detail View window disappears indicating that the Detail View is no longer active. This is the most important step and is often the one that causes the whole operation to fail.
- In the Models dialog box click New. A new Model called Model 2 appears in the list, creating a new model space called Model 2, which has no geometry.
- In the Models dialog box, click on Model 2 to highlight it and click the Current button. This makes Model 2 current in the active View (the Sheet View).
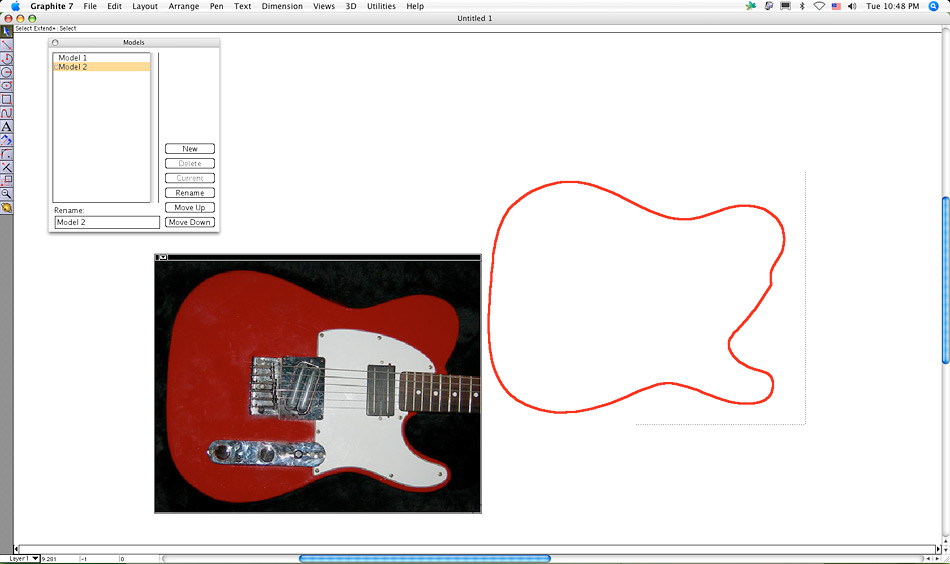
- In the active Sheet View go to View>Bring to Front. This brings the Sheet View on top of the Detail View. Now when you click inside the Detail View window, it does not activate. The Sheet
- View is shielding it from all the tools, enabling you to draw in the Sheet View directly on top of the bitmap image with the Graphite tools without ever having the bitmap image interfering with your new geometry.
- When you are finished tracing, use Menu>Send to Back for the Detail View window to become available for selection. Delete or move the graphic as desired.